Welcome to our guide on How to Put a Patch on a Backpack! If you’ve got a backpack that could use a bit of personality, patches are the perfect solution. Adding a patch is a fun and easy way to showcase your individual style, interests, or memories. Whether you’re a seasoned DIY enthusiast or a first-timer, we’ll walk you through the steps to ensure your patch stays securely attached and looking fantastic. So, grab your favorite patch and let’s give your backpack a creative makeover!
Why Is A Patch Necessary To Put On A Backpack?

A very simple question is frequently asked by backpack users – why is to put a patch on a backpack or why is necessary to put a patch on your backpack? Well, there are many reasons to answer this question. Stay with us.
Adding a patch to a backpack is not quite necessary, but it can serve several practical and personal purposes:
- Personalization: Patches allow individuals to showcase their unique style, interests, and personality, making their backpack stand out from others.
- Identification: In crowded places or group settings, patches can help quickly identify and distinguish one’s backpack from others, making it easier to spot.
- Customization: Patches enable individuals to customize their backpacks with designs, symbols, or logos that hold personal meaning or significance.
- Covering imperfections: Patches can be used to cover up stains, holes, or wear on the backpack, extending its life and maintaining a neat appearance.
- Branding or Support: Some people use patches to represent brands, organizations, or causes they support, turning their backpacks into a platform for expression or advocacy.
While not necessary, adding patches to a backpack is a creative and fun way to infuse it with individuality, functionality, and personal meaning.
Most of the cases, we can see backpacks can be torn or scratched a little. In that case, you cannot throw the almost new backpack into the garbage when you can repurpose it or make it look new or stylish.
However, I am certain, if you are going to put a patch on your backpack, you must have a reason that can be matched to one of the above reasons we already discussed.
Different Patching Methods to Put a Patch on a Backpack
When it comes to customizing your backpack and making it uniquely yours, patches are the way to go! There are various methods you can use to attach patches to your backpack, each with its advantages. From the classic and secure sewing technique to the convenient iron-on method, or the versatility of Velcro patches, you have plenty of options to choose from. Not to mention the temporary and easy-to-use safety pins, as well as the reliable fabric glue for a no-fuss application.
So, what kind of patching method are we going to apply here? Well, let’s explore each method, so you can pick the perfect one to showcase your style and personality on your beloved backpack! Let’s dive into the world of different patching methods to put a patch on a backpack!
Different Methods of Patching
We will categorize the patching methods into 2 main ways. They are:
- Without Sewing Method
- By Sewing Method
Let’s see how many sub-categories we can find out here. They all will be discussed eventually.
1. By Sewing Method
- Hand Sewing
- Machine Sewing
Here in Without Sewing Method, we can see some sub-category methods. They are:
2. Without Sewing Method
- Iron on Patches
- Bonding Patches/ Fabric Glue
- Velcro patches
- Safety pins
- Stick On Patches
How to Put a Patch on a Backpack?
If you’ve been itching to add some personality and flair to your backpack, this is the perfect solution. Patches are a fantastic way to express your individuality and make your bag stand out from the crowd. Let’s use different kinds of patches and make your backpack outstanding.
By Sewing Method
If you’ve got a cool patch and a backpack in need of some pizzazz, you can use this Sewing Method to patch on your backpack. Using the sewing method, we’ll guide you step-by-step on how to securely attach your patches, ensuring they stay put through all your adventures. Let’s get crafty and make your backpack truly one-of-a-kind with the sewing method!
#Method 1: Hand Sewing Method
Hand Sewing Method: Step-By-Step Guide on How to Put a Patch on a Backpack Using Hand Sewing Method
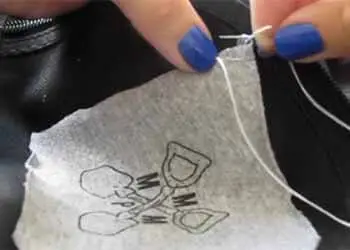
Materials you’ll need:
- Backpack
- Patch
- Needle
- Thread (matching the patch color or backpack)
- Scissors
- Pins (optional, for securing the patch)
Once you have gathered all the necessary items you need you put a patch on a backpack – you are ready to start the process.
Step 1: Choose the Patch
Select the patch you want to attach to your backpack. Ensure it complements your style and fits well on the chosen spot.
Step 2: Position the Patch
Place the patch on the desired spot of your backpack. Use pins to temporarily secure it in place, making sure it’s centered and straight.
Step 3: Thread the Needle
Thread the needle with a sufficient length of thread (around 18 inches) and tie a knot at the end.
Step 4: Start Sewing
Begin sewing from the inside of the backpack to hide the knot. Bring the needle up through the fabric and the patch’s edge, making a small stitch.
Step 5: Continue Sewing
Create a simple running stitch along the edge of the patch, going in and out through the fabric. Keep the stitches close together for a secure attachment.
Step 6: Tie off the thread
When you’ve sewn around the entire patch, secure the thread with a knot on the inside of the backpack.
Step 7: Trim Excess
Thread carefully and cut any excess thread to neaten the appearance.
Step 8: Check the Attachment
Gently tug on the patch to ensure it’s securely attached to the backpack.
Congratulations! You’ve successfully put a patch on your backpack using the hand-sewing method. Enjoy your newly customized backpack, and show off your unique style wherever you go!
Now, we will see the Machine Sewing Method.
#Method 2: Machine Sewing Method
Machine Sewing Method: Step-By-Step Guide on How to Put a Patch on a Backpack Using Machine Sewing Method
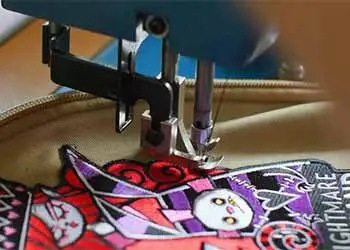
The machine sewing method involves using a sewing machine to securely attach patches to a backpack. It offers efficient and precise stitching, ensuring a durable and professional-looking result. With a sewing machine’s help, you can easily customize your backpack with various patches to reflect your unique style and interests.
Now, let’s begin.
Materials you’ll need:
- Backpack
- Patch
- Sewing machine
- Thread (matching the patch color or backpack)
- Scissors
- Pins (optional, for securing the patch)
Well, if you have got all the required accessories, you are all set. Let’s see how it goes with the machine sewing method to put a patch on a backpack.
Step 1: Choose the Patch
Select a patch that suits your style and fits well on the desired area of your backpack.
Step 2: Position the Patch
Place the patch on the backpack in the desired spot. Use pins to hold it in place, ensuring it’s centered and aligned correctly.
Step 3: Thread the Sewing Machine
Thread your sewing machine with a color that matches either the patch or the backpack.
Step 4: Adjust Stitch Settings
Set your sewing machine to a straight stitch and adjust the stitch length according to your preference (around 2.5 to 3.0 is typical).
Step 5: Start Sewing
Begin sewing from one edge of the patch. Backstitch at the starting point to secure the thread.
Step 6: Sew Along the Edges
Sew around the entire edge of the patch, keeping the stitching close to the patch’s border. Go slowly and guide the fabric to ensure neat stitching.
Step 7: Backstitch at the End
When you’ve sewn around the entire patch, backstitch again to secure the thread at the finishing point.
Step 8: Trim Excess Thread
Carefully trim any excess thread using scissors.
Step 9: Check Attachment
Gently tug on the patch to ensure it’s firmly attached to the backpack.
Congratulations! You’ve successfully attached a patch to your backpack using the machine sewing method. Now, you can proudly show off your customized backpack, ready to accompany you on your adventures in style!
You May be Interested in Some Other Articles:
- How to Attach Trekking Pole to Backpack [from Practical Experience]
- What to Do With an Old Backpack [7 Things to Do]
- Can I Bring a Backpack to Jury Duty?
- Anatomy of a Backpack [Parts of a Backpack with Images]
- Best Backpacks for Medical School
Without Sewing Method
The “without sewing” method involves alternative ways to attach patches to a backpack without using a needle and thread. Common methods include using fabric glue for a quick and easy application or iron-on patches that adhere to the fabric when heat is applied. These methods offer convenience for those who prefer not to sew or need a temporary patch attachment solution.
#Method 3: Iron on Patches Method
Iron on Patches Method: Step-By-Step Guide on How to Put a Patch on a Backpack Using Iron on Patches Method
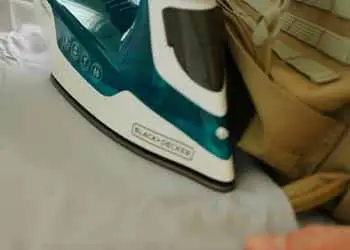
Now if you are thinking on how to put an iron-on patch on a backpack, well, we are here to help. This amazing method can work effectively. Here’s a step-by-step guide on how to put an iron-on patch on a backpack:
Materials you’ll need:
- Backpack
- Iron-on patch
- Iron
- Thin cloth or parchment paper
If you have already managed all the mentioned tools and equipment, you are ready to go. Let’s begin the process on how to use an iron to patch on a backpack.
Step 1: Choose the Patch
Select an iron-on patch that complements your style and matches the desired spot on your backpack.
Step 2: Position the Patch
Place the patch on the backpack in the desired location with the adhesive side down.
Step 3: Protect the Patch
Cover the patch with a thin cloth or parchment paper to prevent direct contact with the iron.
Step 4: Heat the Iron
Preheat your iron to the temperature specified by the patch manufacturer (usually cotton setting).
Step 5: Press the Iron
Press the iron firmly over the covered patch area, applying even pressure for about 10-15 seconds. Check the patch’s packaging for the recommended time.
Step 6: Allow it to Cool
Let the patch cool down for a minute or two before checking the adherence.
Step 7: Check Attachment
Gently peel back the cloth or parchment paper to see if the patch is securely attached. If needed, repeat the ironing process for better adhesion.
Step 8: Finish Up
Once the patch is firmly attached, let your backpack cool down completely before using it.
Congratulations! You’ve successfully applied an iron-on patch to your backpack. Now you can proudly show off your customized backpack with the ease and style of the iron-on method!
#Method 4: Bonding Patches Method
Bonding Patches Method: Step-By-Step Guide on How to Put a Patch on a Backpack Using Bonding Patches Method
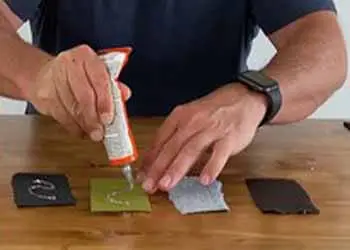
If you are not quite satisfied with the Iron on patch method, you can use Bonding patches method. This method is really awesome. It works effectively and instantly. For a long term change, you can use the bonding patching method.
We are going to discuss the method on how to use bonding patches to put a patch on a backpack. Here’s a step-by-step guide on how to put a patch on a backpack using the bonding method:
Materials you’ll need:
- Backpack
- Patch
- Fabric glue or adhesive bonding material
In this bonding patches or fabric glue method, you can easily put a patch on your backpack. The fabric glue/bonding patching method is really a favorite of all. Then, let’s start the processing.
Step 1: Choose the Patch
Select a patch that suits your style and fits well on the desired area of your backpack.
Step 2: Position the Patch
You need to select the position of the backpack. So, place the patch on the backpack in the desired spot to ensure proper alignment and positioning.
Step 3: Apply Fabric Glue
Using fabric glue or adhesive bonding material, apply a thin, even layer on the backside of the patch. Make sure to cover the edges and corners.
Step 4: Press the Patch
Gently press the patch onto the backpack in the chosen position. Hold it firmly for a few seconds to ensure proper bonding.
Step 5: Allow it to dry
Set the backpack aside and let the patch bond with the fabric. Follow the drying time specified on the fabric glue’s packaging.
Step 6: Check the Attachment
After the specified drying time, verify that the patch is securely bonded to the backpack.
Step 7: Reinforce (optional)
If needed, you can add a few stitches around the patch’s edges to provide extra reinforcement.
Step 8: Finish Up
Once the patch is firmly attached, your customized backpack is ready to show off!
Congratulations! You’ve successfully bonded a patch to your backpack. Now you can proudly carry your personalized backpack and express your unique style wherever you go with the bonding method!
#Method 5: Velcro Patches Method
Velcro Patches Method: Step-By-Step Guide on How to Put a Patch on a Backpack Using Velcro Patches Method

Do you know how to put a velcro patch on backpack? In this section, we will try to enlighten you about the Velcro patching method. Let’s now see a step-by-step guide on how to put a Velcro patch on a backpack:
Materials you’ll need:
- Backpack
- Velcro patch (with hook and loop sides)
If you have gathered the materials you need to put a patch on your backpack, you are ready to start the process. Let’s get the job done.
Step 1: Choose the Patch
Select a Velcro patch that complements your style and fits well on the desired area of your backpack.
Step 2: Position the Patch
Decide where you want the patch to be on your backpack. Make sure the surface is clean and dry.
Step 3: Separate Hook and Loop Sides
If your Velcro patch has separate hook (rough) and loop (soft) sides, detach them before proceeding.
Step 4: Attach the Hook Side
Peel off the adhesive backing from the hook side of the Velcro patch and firmly press it onto the chosen spot on your backpack.
Step 5: Attach the Loop Side to the Patch
Now, peel off the adhesive backing from the loop side of the Velcro patch and firmly press it onto the backside of the patch.
Step 6: Align and Secure
Carefully align the patch with the hook side on the backpack, and press down firmly to secure both sides of the Velcro together.
Step 7: Check Attachment
Gently tug on the patch to ensure it’s firmly attached to the backpack.
Step 8: Finish Up
Congratulations! You’ve successfully attached a Velcro patch to your backpack. Now you can easily swap and customize your patches whenever you like, making your backpack truly unique and versatile.
Enjoy showing off your personalized backpack with the Velcro patch method!
#Method 6: Safety pins Patches Method
Safety pins Patches Method: Step-By-Step Guide on How to Put a Patch on a Backpack Using Safety Pins Method

Sometimes our backpacks can get a scratch and we need to fix that instantly. In that case, a temporary and effective method known as Safety pins patches method is really admirable. You can try it.
We will now show a step-by-step guide on how to put a patch on a backpack using safety pins:
Materials you’ll need:
- Backpack
- Patch
- Safety pins (as needed, depending on the patch size)
If you have been able to manage the above requirement, you are all prepared to go. Now, let’s begin the process.
Step 1: Choose the Patch
Select a patch that you’d like to attach to your backpack. Ensure it complements your style and fits well on the desired area.
Step 2: Position the Patch
Place the patch on the backpack in the desired spot. Use your fingers to hold it in place temporarily.
Step 3: Insert Safety Pins
Carefully insert safety pins through the fabric of the backpack and the patch’s edge. Use enough pins to securely fasten the patch.
Step 4: Spread the Pins
Distribute the safety pins evenly around the patch’s perimeter, keeping it flat against the backpack.
Step 5: Check the Attachment
Gently tug on the patch to ensure it’s securely attached to the backpack.
Step 6: Reinforce (optional)
For larger or heavier patches, you may add additional safety pins to provide extra support.
Step 7: Finish Up
Congratulations! You’ve successfully attached a patch to your backpack using safety pins. Now you can showcase your style and creativity on the go!
Please note that while this method is simple and temporary, it may not be as secure as sewing or adhesive methods. Always be cautious not to prick yourself with the safety pins when handling your backpack. know more.
#Method 7: Stick on Patches Method
Stick on Patches Method: Step-By-Step Guide on How to Put a Patch on a Backpack Using Stick on Patches Method
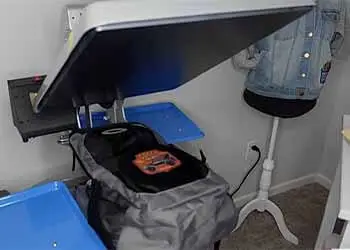
Stick on Patches Method is one of the most effective and amazing methods to put a patch on a backpack. Now, let’s know the step-by-step guide on how to put stick-on patches on a backpack:
Materials you’ll need:
- Backpack
- Stick-on patch
Stick on Patches is then applicable once you gather the materials you need. Since this is a simple and temporary method, you can use it for an instant solution.
Step 1: Choose the Patch
Select stick-on patches that match your style and complement the desired area on your backpack.
Step 2: Clean the Surface
Wipe the surface of the backpack where you want to place the patch to ensure it’s clean and dry.
Step 3: Peel off the Backing
Carefully peel off the adhesive backing from the stick-on patch.
Step 4: Position the Patch
Place the sticky side of the patch on the desired spot of your backpack. Press down firmly to ensure proper adhesion.
Step 5: Smooth it out
Using your fingers, smooth out any wrinkles or bubbles to achieve a clean and flat attachment.
Step 6: Check Attachment
Gently tug on the patch to ensure it’s securely stuck to the backpack.
Step 7: Apply More Patches (optional)
If you want to add more stick-on patches, repeat the steps above and position them accordingly.
Step 8: Finish Up
Congratulations! You’ve successfully attached stick-on patches to your backpack. Now you can showcase your unique style and easily change or remove the patches whenever you like.
Please note that stick-on patches are generally a temporary solution and may not be as durable as sewing or iron-on methods. Be mindful of the adhesive’s longevity and reapply or replace the patches as needed. Read more.
Frequently Asked Questions
Q1: What materials do I need to put a patch on a backpack?
A1: You’ll need a backpack, a patch, and either a needle and thread, fabric glue, iron-on adhesive, Velcro, or safety pins.
Q2: How do I attach a patch using the sewing method?
A2: Position the patch, sew around the edges, and secure with a knot.
Q3: Can I use fabric glue to put a patch on a backpack?
A3: Yes, apply fabric glue to the patch and press it onto the backpack to bond.
Q4: What’s the process for iron-on patches?
A4: Position the patch, cover with cloth, iron on, and allow it to cool.
Q5: How do I use Velcro patches on my backpack?
A5: Stick the hook side on the backpack and the loop side on the patch, then attach them together.
Final Words
In conclusion, adding patches to your backpack is a fantastic way to express your individuality and style. Whether you choose the traditional sewing method for a secure and durable attachment, opt for the convenience of iron-on patches, or explore other methods like fabric glue, Velcro, or safety pins, the possibilities are endless. By following the step-by-step guides provided, you can easily transform an ordinary backpack into a unique masterpiece that reflects your interests and passions. So, go ahead and get creative with your patch choices, and have fun customizing your backpack to make it truly your own! Happy patching!

