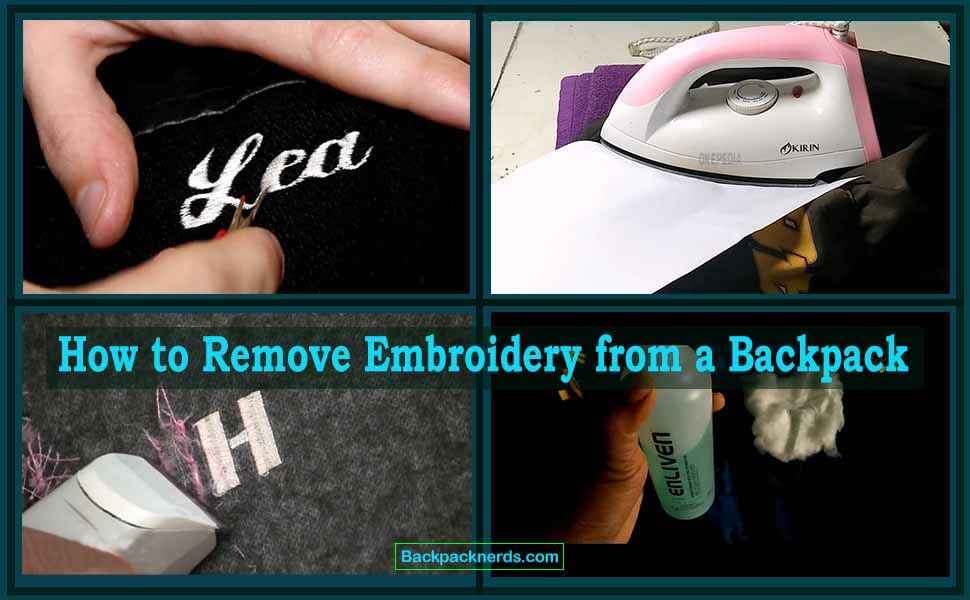
Do you have a backpack or purse with embroidery on it? If so, you may have noticed that some of the designs look a little bit off-kilter. You may even notice that the letters are slightly jumbled. If you’re wondering how to remove embroidery from a backpack, you’re in luck! We’ve got the answer right here.
How to Remove Embroidery from a Backpack
Embroidery can add a beautiful and unique touch to a backpack, but what happens when you want to remove it? Whether you’re looking to change the design, repurpose the backpack, or simply remove a mistake, the process of removing embroidery can be daunting. Is there an easy way to remove embroidery? If yes, how do you remove embroidery or how do you remove a logo from a backpack?
Well, with the right tools and techniques, it is possible to remove embroidery from a backpack without causing damage to the backpack or the embroidery. In this guide, we will walk you through the steps to safely and effectively remove embroidery from your backpack.
What Tools Do You Require To Remove Embroidery?
If you intend to remove embroidery from your bag, there are some tools you must require. Besides those tools, you need to know how to remove embroidery from a backpack.
To remove embroidery, you will need the following tools:
- Seam ripper
- Small & sharp scissors
- Tweezers
- Thimble
- Needle
- Embroidery hoop
- And Magnifying glass
Let’s take a look at a glance at the tools and what they are used for –
- Seam ripper – a small tool with a pointed end and a sharp blade that is used to cut and remove stitches.
- Small & sharp scissors – for trimming any leftover threads.
- Tweezers – to remove any remaining threads or pieces of thread.
- Thimble – to protect your fingers from being poked by the needle.
- Needle – a sharp needle can be used to loosen and remove stitches.
- Embroidery hoop – to hold the fabric steady while you work.
- Magnifying glass – to help you see the stitches more clearly.
Remember to be careful while removing the embroidery, so as not to damage the fabric.
How to Remove Embroidery from a Bag
Now, let’s begin the process on how to remove embroidery from bags.
Do you know how to remove embroidery from any fabric safely or can I remove the embroidery off of this backpack? Well, removing embroidery from a backpack can be a tricky task, but here are some steps on how to remove embroidery quickly that you can follow:
Evaluate the embroidery: Before attempting to remove the embroidery, it’s important to assess the material of the backpack and the embroidery. If the backpack is delicate or the embroidery is made of a delicate material, it may not be possible to remove it without damaging either the backpack or the embroidery.
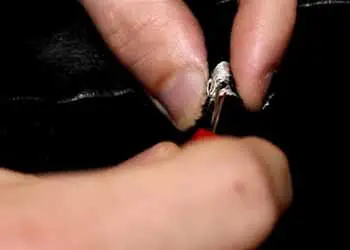
Remove any loose threads: Gently remove any loose threads from the embroidery with a pair of scissors or tweezers.
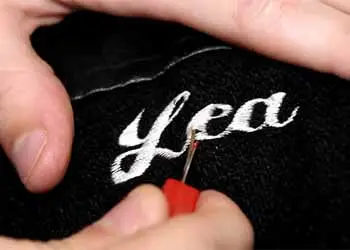
Use a seam ripper: If the embroidery is stitched onto the backpack, you can use a seam ripper to carefully remove the stitches. Insert the seam ripper under the stitch and gently lift it up to cut the thread. Repeat this process for all the stitches.
Use an adhesive remover: If the embroidery is glued onto the backpack, you can use an adhesive remover to dissolve the glue. Apply the adhesive remover to the embroidery and let it sit for a few minutes. Then, use a soft-bristled brush or a toothbrush to gently scrub the embroidery. Be careful not to scrub too hard, as this can damage the backpack.
Wash the backpack: Once the embroidery is removed, wash the backpack according to the manufacturer’s instructions. This will help remove any residue from the adhesive remover or any remaining threads.
If you don’t want to wash the backpack, you can turn the bag inside out. Now look at the backside and pull the loose threads carefully. Once done, you can wipe the bag with a soft wet towel and it’s done. Congratulations!
Note: Removing embroidery can sometimes leave small holes or marks on the backpack. If you’re concerned about this, it may be best to consult a professional to remove the embroidery.
Read More Articles:
- Largest Luggage Size For Check-In
- How To Protect Luggage From Theft
- How To Clean Fabric Luggage
- Can You Wash A North Face Backpack
- How To Wash North Face Backpack
How to Remove Printed Embroidery from Backpack?
How do you remove a monogram from a backpack? Well, removing printed embroidery from a backpack is not that easy but if you can follow proper and careful steps, you can successfully remove the printed embroidery. Let’s do that.
Well, we will use 2 methods here.
Method – 1: Using Nail Polish Remover

Removing embroidery monograms from backpacks is certainly a daunting task. However, to remove the printed embroidery monogram from a backpack, you require some necessary tools.
What you require:
- Nail polish remover
- Cotton wool
- Piece of soft cloth
- Piece of wood
Step – 1: First, what you need to do is place the piece of wood on a plain table or floor. Make sure the wood is placed directly behind the printed embroidery design. Putting the printed embroidery part in the exact place is important.
Step – 2: Now put the cotton wool just onto the printed embroidery design making sure it covers fully the design. You can reconfirm whether the cotton wool is still suitably placed or not by putting your hand on it. If it misplaces somehow, makes it right as it is told.
Step – 3: Again mark the printed embroidery design part that is just under the cotton wool and now pour about 20 – 30 ml of your nail polish remover onto the cotton towel. Remember, this amount of polish can soak the towel as well as the printed embroidery design beneath the cotton wool.
Step – 4: At this stage, you have to wait 10-20 minutes. By this time, the nail polish dropped on the cotton wool should reach to the embroidery design to soak it up fully. Now, if the mentioned minutes are up, it is time you uncovered the cotton wool. You can see the logo or monogram of the backpack is completely soaked with the nail polish remover.
Step – 5: This time, you take another fresh cotton wool and let it soak with the nail polish remover or methylated spirit. Start rubbing gently and then rinse it hard on the printed embroidery design. After sometimes of rubbing, you will notice it disappearing. After about 30 minutes of rinsing, you can see the printed logo design on the backpack has cleared off nicely.
Step – 6: During the rubbing process, you should have to change the cotton wool with the nail polish remover in order to work the process smoothly. Besides, you should rub the place until the printed logo is gone completely. Once it is done, follow the next step.
Step – 7: After the printed logo or monogram from your backpack is completely and successfully removed, let your bag dry because nail polish remover evaporates when exposed to air. And you will see your bag is dry in just a few minutes. You can now take your backpack outside for your personal matter.
Method – 2: Using Hot Iron and Adhesive Paper
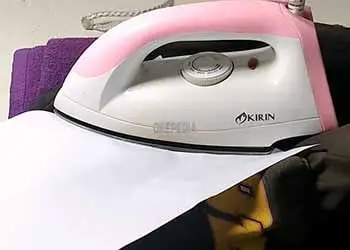
Removing printed embroidery from a backpack can be a delicate process, but it can be done with the help of a hot iron and adhesive paper. Here are the steps to follow:
Step – 1: First, preheat your iron to a low to medium heat setting. It’s important not to use high heat, as this can damage the backpack.
Step – 2: Cut a piece of adhesive paper slightly larger than the embroidery design you want to remove. Place the adhesive side down onto the embroidery design, ensuring that it covers the entire area.
Step – 3: Press down on the adhesive paper with the hot iron for about 10-15 seconds, moving the iron around to ensure that the heat is evenly distributed.
Step – 4: After 10-15 seconds, remove the iron and let the backpack cool for a few seconds.
Step – 5: Gently peel off the adhesive paper, starting at one corner and pulling it back slowly. The printed embroidery should come off with adhesive paper.
Step – 6: If the embroidery does not come off completely, repeat the process with a fresh piece of adhesive paper until all of the embroidery is removed.
Step – 7: Finally, check the backpack for any residue from the adhesive paper or remaining embroidery, and use a gentle cleaning solution to remove it if necessary.
Note: It’s important to be careful when using a hot iron on a backpack. If you’re unsure about the heat setting or whether the backpack can withstand the heat, it’s best to consult a professional or avoid attempting the removal altogether.
More Ways to Remove Printed Embroidery from Backpack
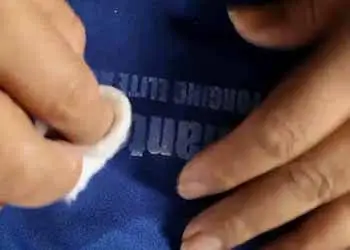
Removing printed embroidery from a backpack can be a bit tricky, but there are a few methods you can try. To perform the job you have to be very careful. Removing embroidery from canvas bag is a challenging task. Let’s try it.
Goo Gone: Goo Gone is a commercial product that can be effective in removing adhesive residue. Apply a small amount to a cloth and gently rub the embroidery.
Sandpaper: For tougher embroidery, you can use sandpaper to remove it. Rub the sandpaper over the embroidery until it starts to come off. Be careful not to sand too hard, as this can damage the backpack.
It’s important to note that these methods can potentially damage the backpack material or color, so it’s always best to test them on a small, inconspicuous area of the backpack before applying them to the embroidery.
How to Remove Embroidery with Backing
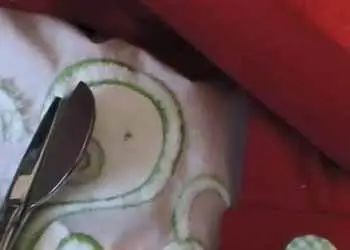
Removing embroidery with backing can be a bit tricky, but it can be done with some patience and the right tools. Here’s a step-by-step guide on how to remove embroidery with backing:
Step – 1: Cut away as much of the excess thread as possible with a pair of sharp scissors. Be careful not to cut the backing fabric.
Step – 2: Gently pull away any loose threads, being careful not to damage the fabric.
Step – 3: Use a seam ripper to carefully cut through the stitches, one by one, on the backside of the fabric. Be sure to only cut through the embroidery thread and not the backing fabric.
Step – 4: Once all the stitches have been cut, use tweezers to pull out any remaining bits of thread.
Step – 5: If there is any adhesive left on the fabric, use a solvent like rubbing alcohol or nail polish remover to dissolve it. Be sure to test the solvent on a small, inconspicuous area of the fabric first to ensure that it won’t damage it.
Step – 6: Once the adhesive is removed, launder the fabric according to its care instructions to remove any remaining residue.
Note: It’s important to be patient and take your time when removing embroidery with backing. Rushing the process can damage the fabric and leave it looking worse than before.
How to Remove Embroidery without a Seam Ripper
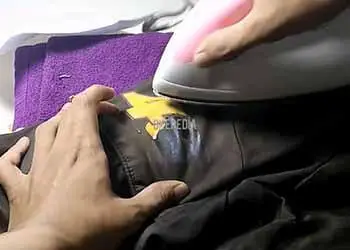
Removing embroidery without a seam ripper can be a bit more challenging, but it is still possible. Here are some steps you can follow:
Step – 1: Use a pair of small, sharp scissors to carefully cut away any excess threads around the embroidery.
Step – 2: Look for any loose threads or knots that can be pulled out with your fingers. Gently tug on the thread, moving it back and forth until it comes loose.
Step – 3: Use a pair of tweezers to carefully pull out any remaining threads. Be sure to work slowly and methodically, taking care not to damage the fabric.
Step – 4: If there are any stubborn threads that won’t come out, try using a small, pointed tool such as a toothpick or a needle to loosen them.
Step – 5: Once you have removed all the embroidery, gently wash the fabric to remove any remaining bits of thread or residue. If the embroidery was done with thick threads, you may need to use a needle to pull out the remaining threads.
Step – 6: After you’ve removed all the threads, you may notice small holes or marks on the fabric where the embroidery was. You can try to remove these marks by lightly rubbing the fabric with a damp cloth or using a fabric shaver to remove any remaining fuzz.
Note: Removing embroidery without a seam ripper can be more time-consuming and tedious than using a seam ripper. If you have a lot of embroideries to remove, it may be worth investing in a seam ripper to make the process easier and faster.
How to Remove Embroidery from Leather Embroidery Eraser
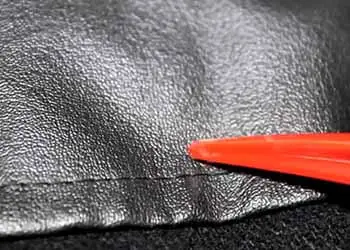
Removing embroidery without a seam ripper can be a little tricky, but it can be done with a few simple tools. Here are the steps:
Step – 1: Use a pair of small, sharp scissors to carefully cut the stitches of the embroidery from the top side of the fabric. Be sure to only cut the embroidery threads and not the fabric underneath.
Step – 2: Once you’ve cut the stitches, use a pair of tweezers to gently pull out the cut threads from the back side of the fabric.
Step – 3: If the embroidery was done with thick threads, you may need to use a needle to pull out the remaining threads.
Step – 4: After you’ve removed all the threads, you may notice small holes or marks on the fabric where the embroidery was. You can try to remove these marks by lightly rubbing the fabric with a damp cloth or using a fabric shaver to remove any remaining fuzz.
Note: Removing embroidery can be time-consuming and may damage the fabric, so proceed with caution and be patient. If you’re unsure about how to remove the embroidery, it may be best to take the item to a professional.
How to Remove Embroidery Using a Stitching Eraser
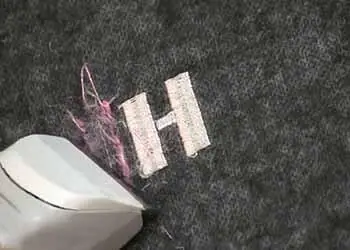
Removing embroidery using a stitching eraser is a simple process, but it requires some patience and attention to detail. Here are the steps you can follow:
Step – 1: Start by selecting the stitching eraser appropriate for the fabric you are working with. For example, use a fine-tip eraser for delicate fabrics like silk, and a heavier eraser for thicker fabrics like denim.
Step – 2: Locate the area of the embroidery that you want to remove. If possible, gently remove any loose threads or fabric around the area to make it easier to work with.
Step – 3: Hold the fabric taut with one hand, and carefully run the eraser along the stitches you want to remove with the other hand. Make sure to work slowly and carefully to avoid damaging the fabric.
Step – 4: Use a pair of tweezers or a needle to remove any remaining threads or fibers from the fabric.
Step – 5: Repeat the process until all the embroidery is removed.
Step – 6: Once you have removed the embroidery, use a lint roller or fabric shaver to remove any remaining fuzz or fibers from the fabric.
Step – 7: If necessary, wash the fabric to remove any remaining fibers or debris.
Remember to take your time and work carefully to avoid damaging the fabric. With a little practice, you should be able to remove embroidery using a stitching eraser with ease.
Final Words
In conclusion, removing embroidery from a backpack requires careful and patient effort. The method used will depend on the type of embroidery and the material of the backpack. Heat, solvents, and sharp tools can all be effective but must be used with caution to avoid damaging the backpack. It is important to work slowly and methodically, testing each step on a small, inconspicuous area before moving on to the rest of the embroidery. With the right tools and techniques, it is possible to successfully remove unwanted embroidery and restore the backpack to its original appearance.
Read More Articles:
- Spinner Vs Roller Luggage
- Hardside Vs Softside Luggage
- How To Measure Luggage
- Luggage Size Guide
- Backpack Checked Luggage

